Using interfaces and shared partial views for common field types in Sitefinity

Sitefinity is one of the content management systems (CMS) we use. We like working with Sitefinity to produce very secure, enterprise quality sites for our clients. Built on the .NET backbone, it’s become a CMS we’ve learned to adapt and use to meet almost every requirement our clients have had. We’ve learned to tailor the system to meet and surpass those requirements and have become close trusted partners with Progress (the company who build Sitefinity) throughout this time. We’ve found that, while the Sitefinity CMS is highly adaptable, it’s not always obvious how to achieve certain objectives. One of these objectives is creating common collections of fields to be used across multiple custom widgets (and by rote, across multiple projects). Common collections of fields are a set of inputs that are common to a purpose (for example image title, image URL) but are used in different contexts across multiple instances of a widget. So this is where we are here to help.
This article is primarily aimed at developers working on Sitefinity. I'm going to take you through the process of creating these common collection fields using the example of mobile and desktop image swapping for certain responsive widgets. In this example, I will show you how to put these fields in an interface along with MVC partial views for re-use on future widgets/projects. This is a similar implementation that Sitefinity uses for its built-in widget model.
Change the widget to use your model binding rather than the properties on the controller.
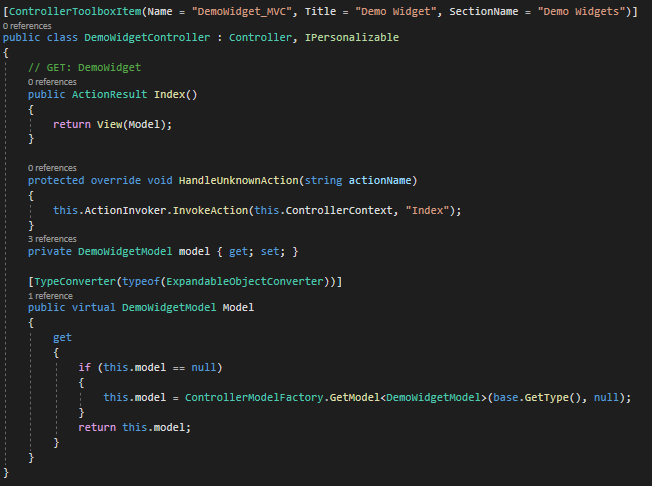
First, we need to start with a default widget created by the Sitefinity VSIX. By default, the properties are defined in the widget controller directly.
We need to remove the public property Message (which is the Default property on a new widget) from the controller. We then need to add a private and public model using the ControllerModelFactory.GetModel method for binding the model properties for access by the widget.
private DemoWidgetModel model { get; set; }
[TypeConverter(typeof(ExpandableObjectConverter))]
public virtual DemoWidgetModel Model
{
    get
    {
        if (this.model == null)
        {
            this.model = ControllerModelFactory.GetModel(base.GetType(), null);
        }
        return this.model;
    }
}
We modify the index controller method to pass the model to the view.

Set up your common fields as an interface
Next, we're going to adapt our widget to add:
- A desktop image selector
- A mobile image selector
- A common image provider name
We also need a model to pass to the frontend view so we have useful information like the Image URL and meaningful Alt text instead of just the selected Image GUID (which is Sitefinity’s default practice).
public interface IResponsiveImageModel
{
    Guid DesktopImageId
    {
        get;
        set;
    }
    Guid MobileImageId
    {
        get;
        set;
    }
    string ImageProviderName
    {
        get;
        set;
    }
    ResponsiveImageViewModel ResponsiveImageModel { get; }
}
In order to handle processing the image ID’s for the frontend view model every time this widget is used, we create a ResponsiveImageViewModel class. This class will generate the frontend view properties referencing the selected image GUID’s.

The ImageHelper class is a static class created to hold some common image tasks. You can find the code for this in the Github.
Implement your interface on your model
Now to make use of these fields! We implement them on our model (this can then be implemented on any widget model that requires these fields) as follows:
.png?sfvrsn=1058c147_1)
Setup your designer view
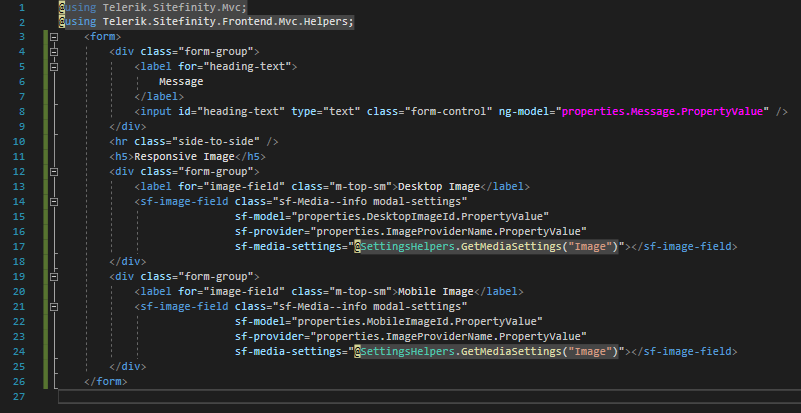
Now that we’ve done this, the new model fields are accessible by the widget. However we need a custom designer view, otherwise we won’t have a selector for the Images. This is pretty standard for creating custom widgets and you’ll end up with something like (file titled DesignerView.Default.cshtml under the /MVC/Views/DemoWidget folder in the Github):

Since the Responsive image section is something we’d like to reuse on future widgets, we can make its mark-up be a shared partial view. Under /MVC/Views/Shared we can create our partial view (“_ResponsiveImageSelector.cshtml”)

We can also define the model as a string if we want (this is optional for adding custom labels on different widgets if needed, also not restricted to a single string model).
Now in our designer view template we replace the existing mark-up with the partial reference.

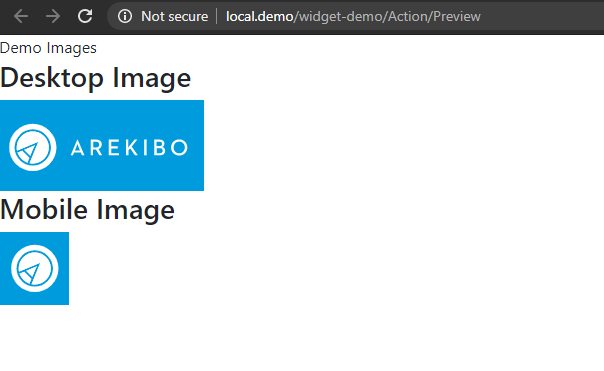
We also update our frontend view template to output your widget data.

And that’s it! Build your solution and run the site.
Test your widget backend interface and frontend display
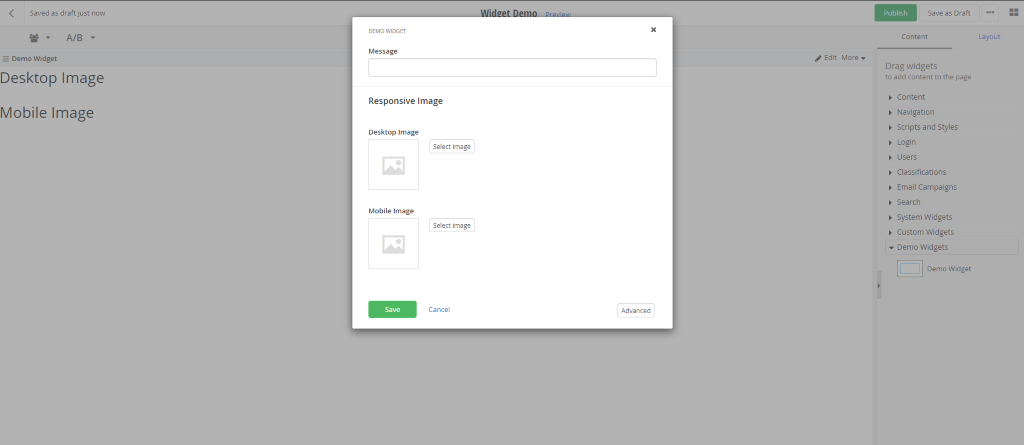
Within the Sitefinity CMS interface, your widget designer should look something like this:


Conclusion
As can be seen here, it’s not a particularly difficult task to create custom, reusable Sitefinity widgets with custom common field collections using this method. However, I found the documentation around this process somewhat hazy, so using the above guide, you should be able to:
- Create a custom widget
- Leverage MVC partial views for grouping common custom fields
- Make those elements scalable and resuable
Now that we know how to do this, in the next article, I’ll look at enhancing this reusability by implementing template selectors with feature filtering.
Would you like to unlock the full potential of your Sitefinity CMS? Talk to our team today!
/digital-experience-monitoring---dem.webp?sfvrsn=19be2099_1)
/accessibility28d4bbc3-45f3-4863-8c00-2736f6d618fd.webp?sfvrsn=2d2da79b_3)
/googleconsent-p2.webp?sfvrsn=6a8d7a48_3)